
In this tutorial, I am going to show you how to create a carousel of your portfolio items that you can use to showcase your work. A portfolio carousel is a great way to showcase multiple portfolio items at once and I am going to show you how to add them to any post or page.
Register the portfolio post type
The first thing you will need to do is register the portfolio post type. To do this, simply download the portfolio post type plugin. This plugin takes the legwork out of having to register your portfolio post type.
Add your functions
Add the below code to your functions.php file within your child theme.
| <?php | |
| /** | |
| * Portfolio carousel shortcode | |
| * Author: James Roberts | |
| * | |
| */ | |
| //* Enqueue Owl and font awesome | |
| add_action( ‘wp_enqueue_scripts’, ‘enqueStuff’ ); | |
| //* Add Archive Settings option to Portolio CPT | |
| add_post_type_support( ‘portfolio’, ‘genesis-cpt-archives-settings’ ); | |
| //* Add shortcode | |
| add_shortcode( ‘portfolio-carousel’ , ‘carouselSc’ ); | |
| /** | |
| * Enque styles and scripts. | |
| */ | |
| function enqueStuff() { | |
| //* Owl carousel | |
| wp_enqueue_style( ‘owl.carousel’, get_bloginfo( ‘stylesheet_directory’ ) . ‘/owl.carousel/assets/owl.carousel.css’ ); | |
| wp_enqueue_script( ‘owl.carousel.min’, get_bloginfo( ‘stylesheet_directory’ ) . ‘/owl.carousel/owl.carousel.min.js’, array( ‘jquery’ ) ); | |
| wp_enqueue_script( ‘owl_init’, get_bloginfo( ‘stylesheet_directory’ ) . ‘/js/owl_init.js’, array( ‘jquery’ ) ); | |
| wp_enqueue_style( ‘font-awesome’, ‘//netdna.bootstrapcdn.com/font-awesome/4.1.0/css/font-awesome.min.css’ ); | |
| } | |
| /** | |
| * Creates shortcode for the carousel. | |
| */ | |
| function carouselSc($atts){ | |
| $args = array( | |
| ‘post_type’ => ‘portfolio’, | |
| ); | |
| $loop = new WP_Query( $args ); | |
| if( $loop->have_posts() ){ | |
| //loop through portfolio items | |
| $content .= “<div class=’owl-carousel’>”; | |
| while( $loop->have_posts() ): $loop->the_post(); | |
| if( has_post_thumbnail( ) ){ | |
| $url = wp_get_attachment_url( get_post_thumbnail_id(get_the_ID()) ); | |
| $content .= “<div class=’item’>”; | |
| $content .= “<div style=’background-image: url(” . $url . “);’>”; | |
| $content .= “</div>”; | |
| $content .= “<div class=’lp-caption-carousel’>”; | |
| $content .= “<h3>” . get_the_title() . “</h3>”; | |
| $content .= “<p>” . substr(get_the_excerpt(), 0, 30) . “</p>”; | |
| $content .= “<a class=” href='” . get_the_permalink() . “‘>[ Read More ]</a>”; | |
| $content .= “</div>”; | |
| $content .= “</div>”; | |
| } | |
| endwhile; | |
| $content .= “</div>”; | |
| } | |
| return $content; | |
| } |
Enqueue Owl
To make our portfolio carousel work, we are going to use Owl Carousel 2 which is a jQuery plugin. Head on over to Owl Carousel 2 and download the latest version. Create a directory within your child theme and call it owl.carousel. Now add the assets folder and the owl.carousel.min.js file from the download to your owl.carousel directory.
Initiate Owl
In order to tell our portfolio carousel when to run, we need to add a little jQuery. Create a directory within your child theme and name it js. Create a file within the js directory, name it owl_init.js and add the following code.
| // initiate owl | |
| jQuery(document).ready(function($){ | |
| $(‘.owl-carousel’).owlCarousel({ | |
| rtl:true, | |
| loop:true, | |
| margin:0, | |
| nav:true, | |
| responsive:{ | |
| 0:{ | |
| items:1 | |
| }, | |
| 600:{ | |
| items:3 | |
| }, | |
| 1000:{ | |
| items:5 | |
| } | |
| } | |
| }) | |
| }) |
Lets add some style
Add the following to your style.css file.
| /*———————————————————————————–* | |
| /* Portfolio carousel | |
| /*———————————————————————————–*/ | |
| .lp-caption-carousel { | |
| background-color: rgba(0, 0, 0, 0); | |
| visibility: hidden; | |
| position: absolute; | |
| top: 0px; | |
| left: 0px; | |
| width: 100%; | |
| height: 100%; | |
| text-align: center; | |
| color: #fff; | |
| -moz-transition: all .2s ease-in; | |
| -o-transition: all .2s ease-in; | |
| -webkit-transition: all .2s ease-in; | |
| transition: all .2s ease-in; | |
| padding: 15px; | |
| } | |
| div.item:hover div { | |
| background-color: rgba(0, 0, 0, 0.5); | |
| visibility: visible; | |
| } | |
| .item div{ | |
| background-size: cover; | |
| background-position: center center; | |
| height: 200px; | |
| } | |
| .item h3, .item a{ | |
| color: #fff; | |
| } | |
| .owl-nav div { | |
| position: absolute; | |
| top: 40%; | |
| width: 50px; | |
| height: 50px; | |
| border-radius: 100%; | |
| -moz-border-radius: 100%; | |
| -webkit-border-radius: 100%; | |
| background-color: #3d91f0; | |
| text-indent: -9999px; | |
| overflow: hidden; | |
| } | |
| .owl-next { | |
| right: 25px; | |
| } | |
| .owl-prev { | |
| left: 25px; | |
| } | |
| .owl-next:after { | |
| content: “\f105”; | |
| text-indent: 15px; | |
| } | |
| .owl-prev:after { | |
| content: “\f104”; | |
| text-indent: 20px; | |
| } | |
| .owl-nav div:after { | |
| font: normal normal normal 14px/1 FontAwesome; | |
| font-size: 40px; | |
| display: block; | |
| color: #fff; | |
| margin-top: -25px; | |
| } | |
| @media only screen and (max-width: 768px) { | |
| .lp-caption-carousel { | |
| background-color: rgba(0, 0, 0, 1); | |
| visibility: visible; | |
| position: static; | |
| text-align: center; | |
| color: #fff; | |
| transition: all .2s ease-in; | |
| height: 92px !important; | |
| display: block; | |
| } | |
| .lp-caption-carousel p { | |
| display: none; | |
| } | |
| div.item:hover div { | |
| background-color: rgba(0, 0, 0, 1); | |
| } | |
| } | |
| @media (max-width:1201px) and (min-width:960px) { | |
| .lp-caption-carousel p { | |
| display: none; | |
| } | |
| } |
Create your portfolio
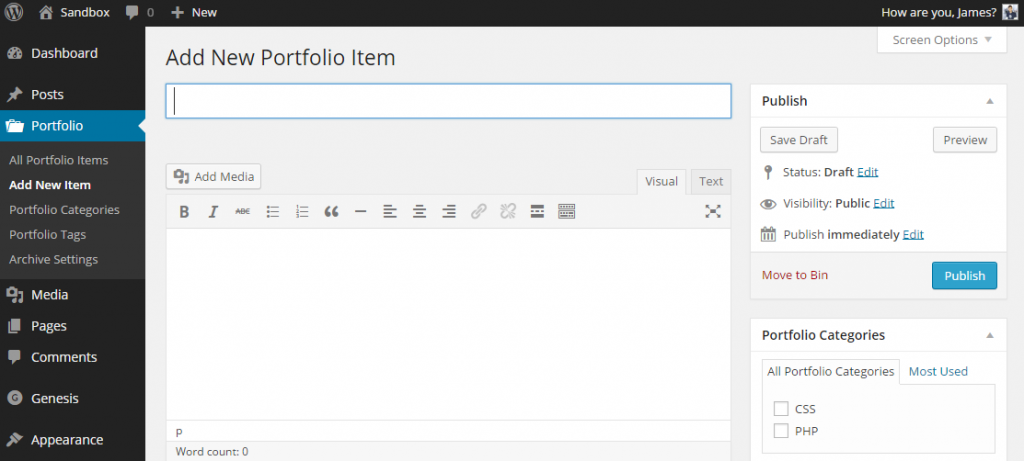
Now simply add some portfolio items. To add portfolio items, go to Portfolio -> Add New Item in the WordPress dashboard. Now just add a portfolio item as you would a normal post or page, adding a heading, content and a featured image.
Add the portfolio carousel to any post or page
Now all you need to do is add your carousel to any pot or page by using the shortcode [portfolio-carousel]. All done.
Wrap up
I hope you find this tutorial useful and enjoy using your portfolio carousels. If you wish to get notified of new, free content ranging from Genesis tutorials like this, to general WordPress tips and tricks then please feel free to sign up to my news letter below. I promise I will never spam you.
Leave a Reply