
Adding a portfolio to your website is a great way to show the world what you can do. Your portfolio represents what your business does and is a fantastic way to showcase your work. Adding a portfolio is one thing, but you could also give your users easier access to the specific areas of your work, by making your portfolio filterable. Creating a filterable portfolio in Genesis is actually really easy.
Follow the below steps to quickly set up an attractive, functional and filterable portfolio in Genesis. Please note, in order for this to work you will need to have the Genesis framework installed.
1/ Register the portfolio
So the first thing you need to do is register the custom post type and custom taxonomies. Luckily there is a plugin that will do all this leg work for you. If you do not already have it installed, go ahead and install the Portfolio Post Type plugin from the WordPress repository. After installing and activating the plugin, you will see that there is a new Portfolio custom post type in the WordPress dashboard. The plugin also registers 2 custom taxonomies, categories and tags.
2/ Edit the functions file
Add the following to your child theme’s functions.php.
| <?php | |
| //* Do NOT include the opening php tag | |
| //* Add Archive Settings option to Portolio CPT | |
| add_post_type_support( ‘portfolio’, ‘genesis-cpt-archives-settings’ ); | |
| //* Define custom image size for Portfolio images in Portfolio archive | |
| add_image_size( ‘portfolio-image’, 330, 230, true ); |
3/ Add jQuery files
In order to make our portfolio filterable, we are going to use a fantastic jQuery plugin called Isotope.
Create a directory in the root of your child theme and download the latest version of Isotope, add the isotope.pkgd.min.js file to the js directory.
Create a file and call it isotopes_init.js and place it inside your child themes js directory. Add the following code to the isotopes_init.js file.
| jQuery(function($){ | |
| $(window).load(function() { | |
| /*main function*/ | |
| function portfolioIsotope() { | |
| var $container = $(‘.portfolio-content’); | |
| $container.isotope({ | |
| itemSelector: ‘.portfolio-item’ | |
| }); | |
| } portfolioIsotope(); | |
| /*filter*/ | |
| $(‘.filter a’).click(function(){ | |
| var selector = $(this).attr(‘data-filter’); | |
| $(‘.portfolio-content’).isotope({ filter: selector }); | |
| $(this).parents(‘ul’).find(‘a’).removeClass(‘active’); | |
| $(this).addClass(‘active’); | |
| return false; | |
| }); | |
| /*resize*/ | |
| var isIE8 = $.browser.msie && +$.browser.version === 8; | |
| if (isIE8) { | |
| document.body.onresize = function () { | |
| portfolioIsotope(); | |
| }; | |
| } else { | |
| $(window).resize(function () { | |
| portfolioIsotope(); | |
| }); | |
| } | |
| // Orientation change | |
| window.addEventListener(“orientationchange”, function() { | |
| portfolioIsotope(); | |
| }); | |
| }); | |
| }); |
4/ Create the filterable portfolio page
Create a file in your theme’s directory and call it archive-portfolio.php. Paste the following code into your new file and save.
| <?php | |
| /** | |
| * Portfolio Archive | |
| * Author: James Roberts | |
| * | |
| */ | |
| // Force full width content (optional) | |
| add_filter( ‘genesis_pre_get_option_site_layout’, ‘__genesis_return_full_width_content’ ); | |
| //remove standard loop (optional) | |
| remove_action( ‘genesis_loop’, ‘genesis_do_loop’ ); | |
| // Add our custom loop | |
| add_action( ‘genesis_loop’, ‘lp_filterable_portfolio’ ); | |
| // Enqueue javascript | |
| wp_enqueue_script(‘isotope’, get_stylesheet_directory_uri() . ‘/js/isotope.pkgd.min.js’, array(‘jquery’), ‘1.5.25’, true); | |
| wp_enqueue_script(‘isotope_init’, get_stylesheet_directory_uri() . ‘/js/isotopes_init.js’, array(‘isotope’), ”, true); | |
| /** | |
| * Get Excerpt. | |
| * | |
| * @since 1.0 | |
| * | |
| */ | |
| function the_excerpt_max_charlength($charlength) { | |
| $excerpt = get_the_excerpt(); | |
| $charlength++; | |
| if ( mb_strlen( $excerpt ) > $charlength ) { | |
| $subex = mb_substr( $excerpt, 0, $charlength – 5 ); | |
| $exwords = explode( ‘ ‘, $subex ); | |
| $excut = – ( mb_strlen( $exwords[ count( $exwords ) – 1 ] ) ); | |
| if ( $excut < 0 ) { | |
| echo mb_substr( $subex, 0, $excut ); | |
| } else { | |
| echo $subex; | |
| } | |
| echo ‘[…]’; | |
| } else { | |
| echo $excerpt; | |
| } | |
| } | |
| /** | |
| * Output filterable portfolio items. | |
| * | |
| * @since 1.0 | |
| * | |
| */ | |
| function lp_filterable_portfolio( ){ | |
| $terms = get_terms( ‘portfolio_category’ ); | |
| $count=0; | |
| ?> | |
| <div class=”archive-description”> | |
| <?php if( $terms ) { ?> | |
| <ul id=”portfolio-cats” class=”filter clearfix”> | |
| <li><a href=”#” class=”active” data-filter=”*”><span><?php _e(‘All’, ‘lp’); ?></span></a></li> | |
| <?php | |
| foreach( $terms as $term ){ | |
| echo “<li><a href=’#’ data-filter=’.$term->slug’><span>$term->name</span></a></li>”; | |
| } | |
| ?> | |
| </ul><!– /portfolio-cats –><br/><br/> | |
| <?php } ?> | |
| <?php if( have_posts() ) { ?> | |
| <div id=”portfolio-wrap” class=”clearfix filterable-portfolio”> | |
| <div class=”portfolio-content”> | |
| <?php while( have_posts() ): the_post(); ?> | |
| <?php $count++; ?> | |
| <?php $terms = get_the_terms( get_the_ID(), ‘portfolio_category’ ); ?> | |
| <?php if ( has_post_thumbnail($post->ID) ) { ?> | |
| <article class=”portfolio-item col-<?php echo $count; ?> <?php if( $terms ) foreach ( $terms as $term ) { echo $term->slug .’ ‘; }; ?>”> | |
| <a href=”<?php the_permalink() ?>” rel=”bookmark” title=”<?php the_title_attribute(); ?>”><?php echo genesis_get_image( array( size => ‘portfolio-image’ ) ); ?> | |
| <div class=”portfolio-overlay”> | |
| <h3><?php the_title(); ?></h3> | |
| <p><?php the_excerpt_max_charlength(50);?></p> | |
| </div><!– overlay –></a> | |
| </article> | |
| <?php } ?> | |
| <?php endwhile; ?> | |
| </div><!– /themes-content –> | |
| </div><!– /themes-wrap –> | |
| <?php } ?> | |
| </div> | |
| <?php | |
| } | |
| genesis(); |
5/ Add CSS
Add the following to your child theme’s style.css file.
| /* # Filterable portfolio | |
| —————————————————————————————————- */ | |
| .post-type-archive-portfolio .archive-description{ | |
| overflow: hidden; | |
| } | |
| ul.filter { | |
| color: #999; | |
| list-style: none; | |
| border-bottom: 1px solid rgba(0, 0, 0, 0.1); | |
| } | |
| ul.filter li { | |
| float: left; | |
| } | |
| ul.filter li:first-child { | |
| margin-left: 0; | |
| } | |
| ul.filter a { | |
| color: #555; | |
| display: block; | |
| padding: 0.5rem 1rem; | |
| text-decoration: none; | |
| border-bottom: none; | |
| font-size: 1.5rem; | |
| font-weight: 300; | |
| border-top: 4px solid #fff; | |
| } | |
| ul.filter a:hover, ul.filter a.active { | |
| border-top: 4px solid #3d91f0; | |
| } | |
| .filterable-portfolio { | |
| margin-left: -2rem; | |
| margin-left: -20px; | |
| } | |
| .portfolio-item { | |
| float: left; | |
| margin-bottom: 2rem; | |
| margin-bottom: 40px; | |
| margin-left: 2rem; | |
| margin-left: 20px; | |
| position: relative; | |
| width: 23%; | |
| } | |
| .portfolio-item a img { | |
| display: block; | |
| margin-bottom: 0; | |
| } | |
| .portfolio-overlay { | |
| color: #fff; | |
| position: absolute; | |
| width: 100%; | |
| text-align: center; | |
| top: 0px; | |
| width: 100%; | |
| height: 100%; | |
| background-color: rgba(0,0,0,0.5); | |
| padding: 30px; | |
| opacity: 0; | |
| -webkit-transition: all 0.2s ease-in-out; | |
| -moz-transition: all 0.2s ease-in-out; | |
| -o-transition: all 0.2s ease-in-out; | |
| transition: all 0.2s ease-in-out; | |
| } | |
| .portfolio-item img:hover + .portfolio-overlay, .portfolio-overlay:hover { | |
| opacity: 1; | |
| } | |
| .portfolio-overlay h3 { | |
| font-weight: bold; | |
| margin: 0; | |
| width: 100%; | |
| padding: 5px 7px; | |
| text-transform: uppercase; | |
| color: #fff; | |
| } | |
| .clearfix{ | |
| clear: both; | |
| } | |
| /*———————————————————————————–* | |
| /* = Isotope CSS Animations | |
| /*———————————————————————————–*/ | |
| .isotope, .isotope .isotope-item { -webkit-transition-duration: 0.6s; -moz-transition-duration: 0.6s; -ms-transition-duration: 0.6s; -o-transition-duration: 0.6s; transition-duration: 0.6s; } | |
| .isotope { -webkit-transition-property: height, width; -moz-transition-property: height, width; -ms-transition-property: height, width; -o-transition-property: height, width; transition-property: height, width; } | |
| .isotope .isotope-item { -webkit-transition-property: -webkit-transform, opacity; -moz-transition-property: -moz-transform, opacity; -ms-transition-property: -ms-transform, opacity; -o-transition-property: top, left, opacity; transition-property: transform, opacity; } | |
| /**** disabling Isotope CSS3 transitions ****/ | |
| .isotope.no-transition, .isotope.no-transition .isotope-item, .isotope .isotope-item.no-transition { -webkit-transition-duration: 0s; -moz-transition-duration: 0s; -ms-transition-duration: 0s; -o-transition-duration: 0s; transition-duration: 0s; } | |
| .filterable-portfolio-page .content .entry-header { | |
| margin-bottom: 1rem; | |
| margin-bottom: 10px; | |
| } | |
| .filterable-portfolio-page .content .entry-title { | |
| margin-bottom: 3rem; | |
| margin-bottom: 30px; | |
| } | |
| @media only screen and (max-width: 1179px) { | |
| .portfolio-item { | |
| width: 22%; | |
| } | |
| } | |
| @media only screen and (max-width: 1023px) { | |
| .portfolio-item { | |
| width: 30%; | |
| } | |
| } | |
| @media only screen and (max-width: 500px) { | |
| .portfolio-item { | |
| width: 100%; | |
| } | |
| } |
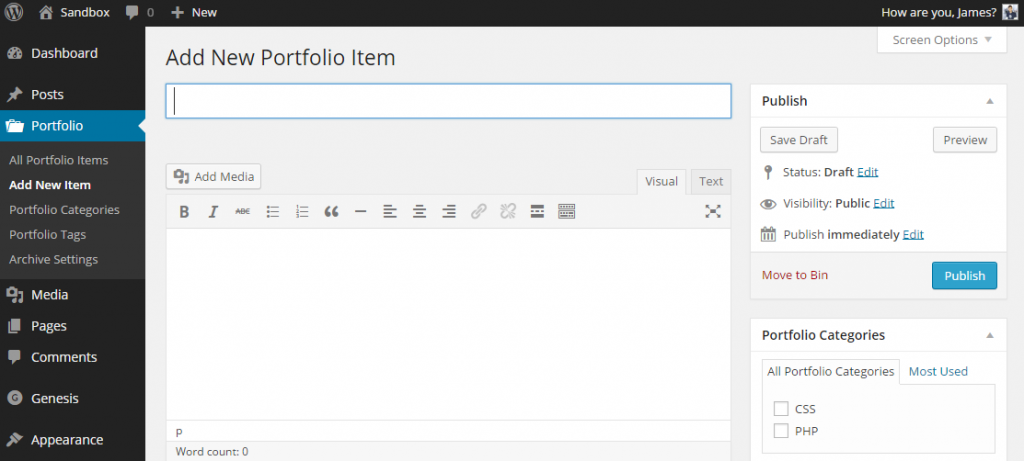
6/ Create Portfolio Items
Now all you need to do is add some portfolio items. To add portfolio items, go to Portfolio -> Add New Item in the WordPress dashboard. Now just add a portfolio item as you would a normal post or page, adding a heading, content and a featured image.
Conclusion
Adding a filterable portfolio in Genesis powered websites is really easy, and takes no time at all. If you wish to change the look of the filterable portfolio page, simple modify the CSS provided in step 5.
I would like to thank a few people whose blog posts and resources have helped me to create this tutorial…
I hope you have found this tutorial useful, if so please feel free to sign up below for regular free content, from WordPress tutorials through to general Genesis tips and tricks.
Leave a Reply