I recently did a talk at WordCamp London, where I went over some basic techniques that can be used to automate various parts of your business using Zapier and other tools. This makes you more productive and can save you time and money.
@LlamaPress Following on from #wcldn, can you do a post or a video on getting emails from a specific Gmail sender into Slack via Zapier?
— Claire Brotherton (@abrightclearweb) April 12, 2016
After my talk, I got asked by Claire Brotherton if I would be able to follow up on my talk with a tutorial on how to get notified in Slack of a new email from a specific Gmail user via Zapier. So, here goes…
Sign Up To Zapier
 In this tutorial, I am going to be using the popular automation service, Zapier, in order to set up the integration between Gmail and Slack. Zapier provides an easy to use interface, that lets you set up various API integrations between different applications. Without Zapier or some other API automation service, this would involve writing complicated scripts that integrate with both the Gmail and Slack API. Using Zapier will make this a much easier task to achieve. Zapier is a premium service, however, it does come with a basic free plan that will let you set-up 5 API integrations, however, you are limited to 100 tasks per month. The premium services start at $20.00 per month.
Create a Zap
A Zap is what Zapier calls the individual API integrations you can create within Zapier. I will now walk you through the steps in creating the Zap we need in order to get notified in Slack whenever we get a new email from a specific Gmail user. When you have logged into Zapier, click the ‘Make a new Zap’ button.
Step 1
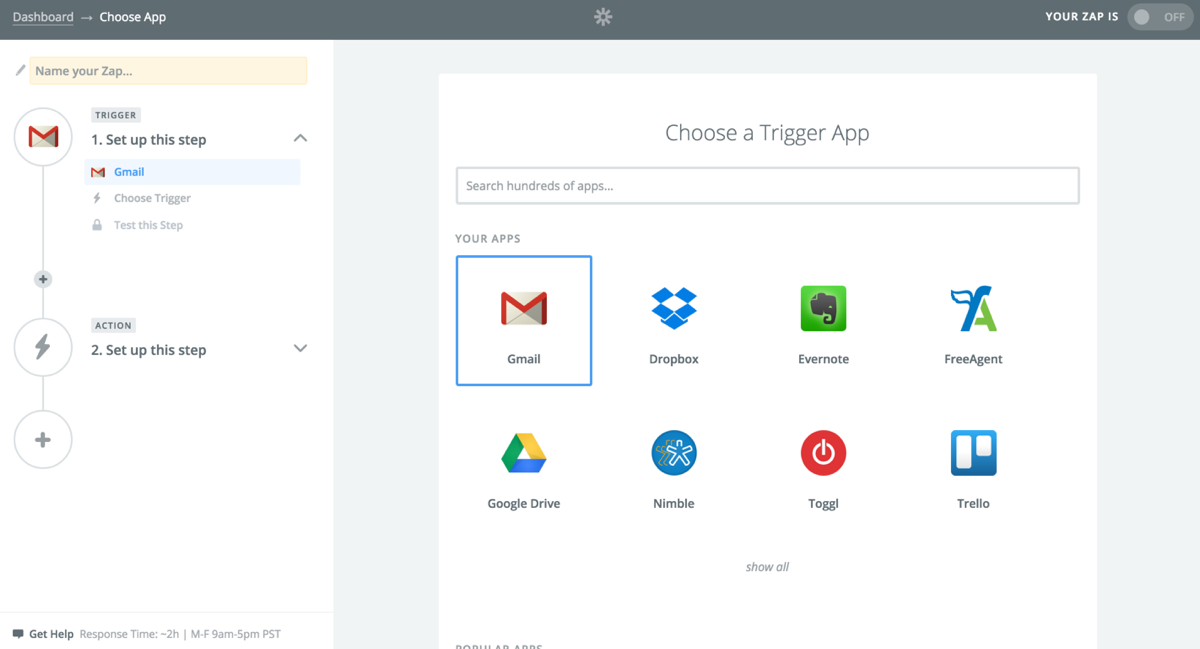
The first thing you need to do is select the ‘trigger app’. In this case, we need to select Gmail.
Step 2
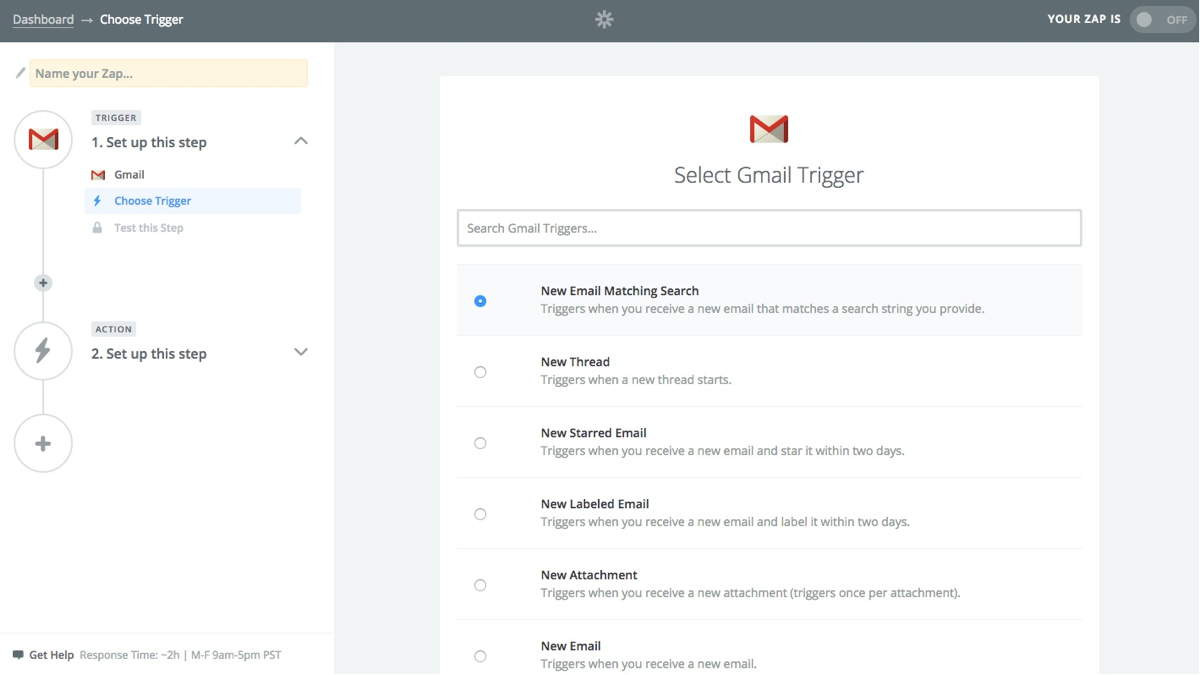
Next, we need to select the trigger. In this case, we need to trigger this zap every time there is a new email from a specific Gmail user, so we have selected the first option.
Step 3

Now we need to select the Gmail account this Zap is associated with. This is because you can have multiple Gmail accounts associated to your Zapier account. For this Zap, I have selected my own Gmail account.
If you have not already linked your Gmail account to your Zapier account, you can do this by clicking on the ‘Connect a new account’ button. When you click this button, you will be presented with a popup, prompting you to grant Zapier various permissions to access your Gmail account. When you grant Zapier the appropriate permissions, you can then select your account as seen above.
Step 4

The next thing you need to do is set up your search criteria. Zapier will use this to decide when to run this Zap. In this case, we want this Zap to run every time we get an email from a specific Gmail user. Due to this section working the same way as the search bar you see in Gmail, to do this, we need to enter ‘from:name’.
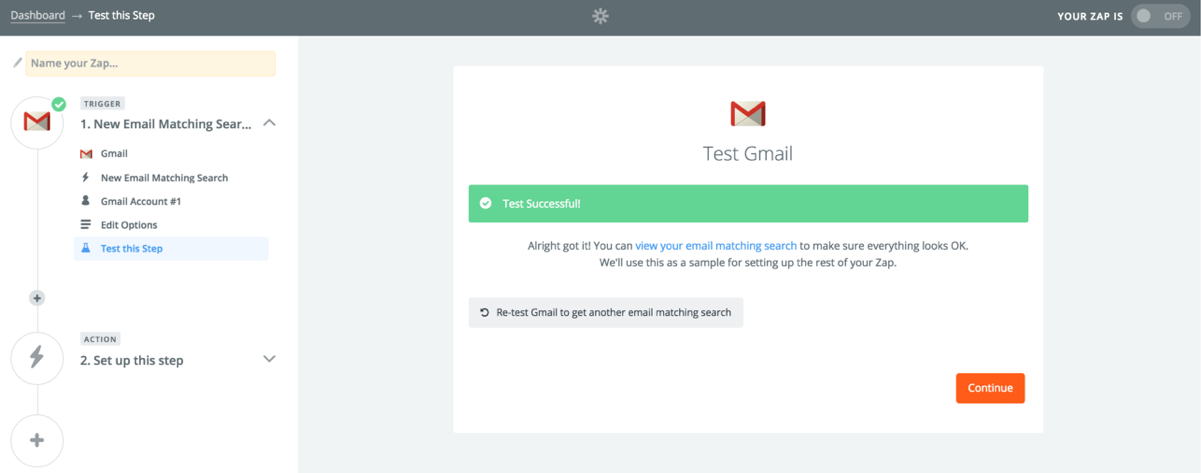
Step 5
[one-half-first]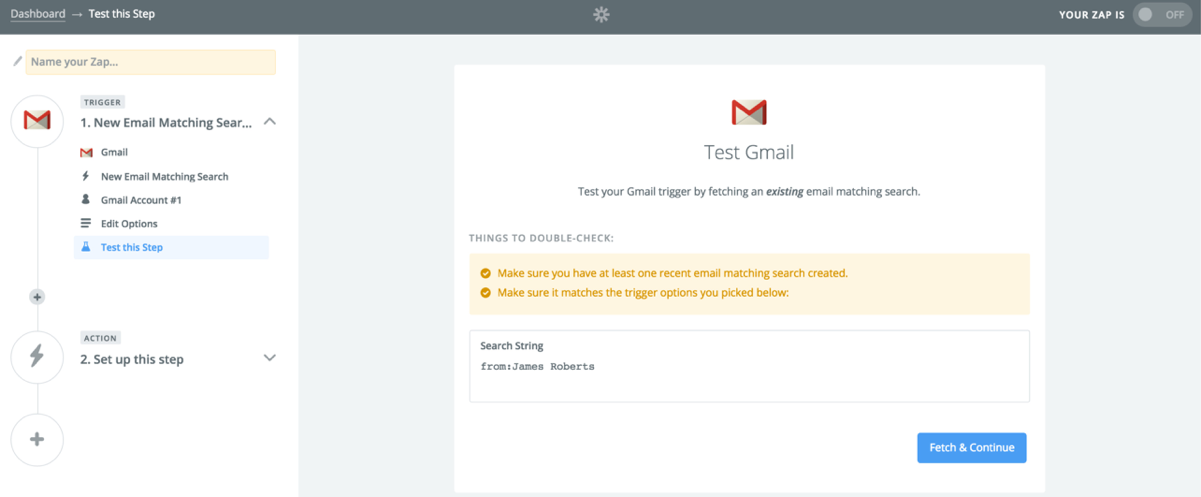 [/one-half-first]
[one-half]
[/one-half]
[clearfix]
In this next step, Zapier lets us test that this Gmail trigger works by fetching an existing email matching our search criteria. As you can see above, this trigger is working fine.
Step 6
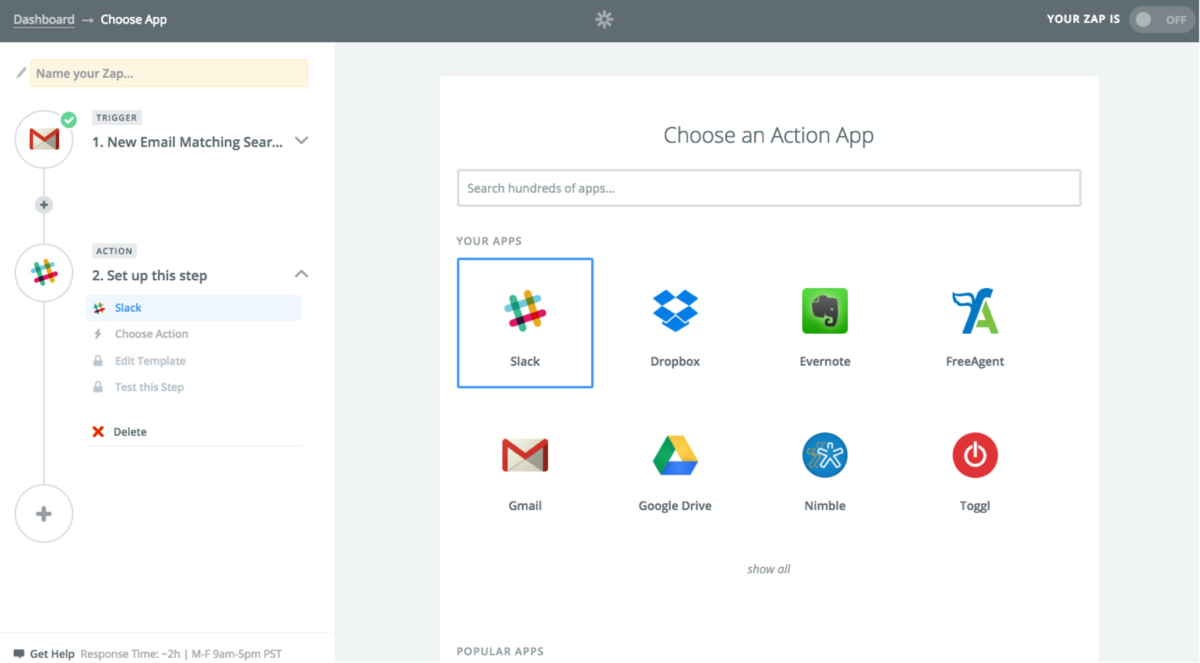
After we have set up our trigger app, we need to set up the ‘action app’. As we want to get notified in Slack of an email from a specific Gmail user, we choose Slack.
Step 7
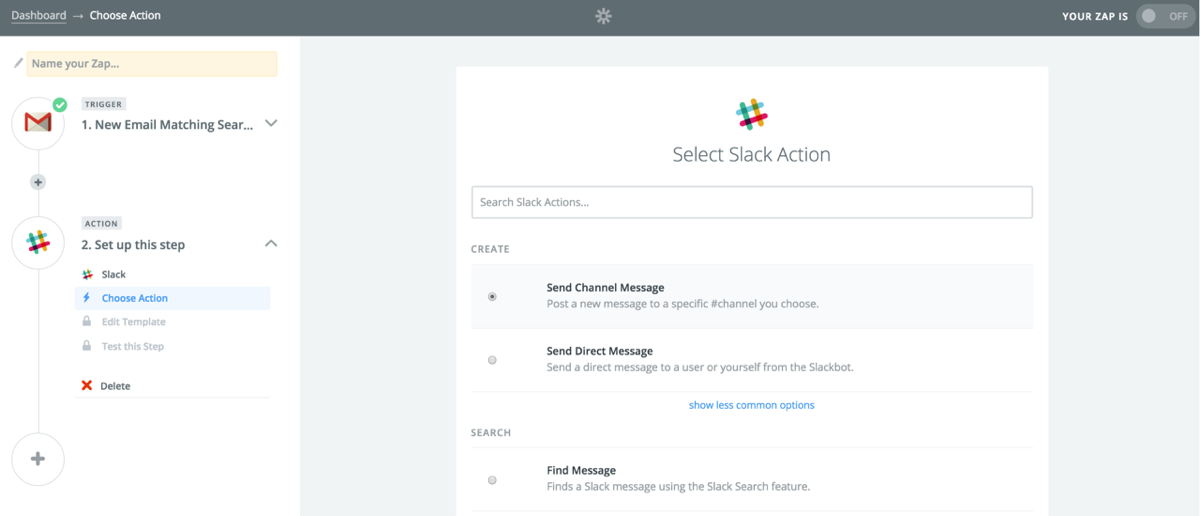
Next, we need to set up the Slack action. For this Zap, we need to select ‘Send Channel Message’.
Step 8
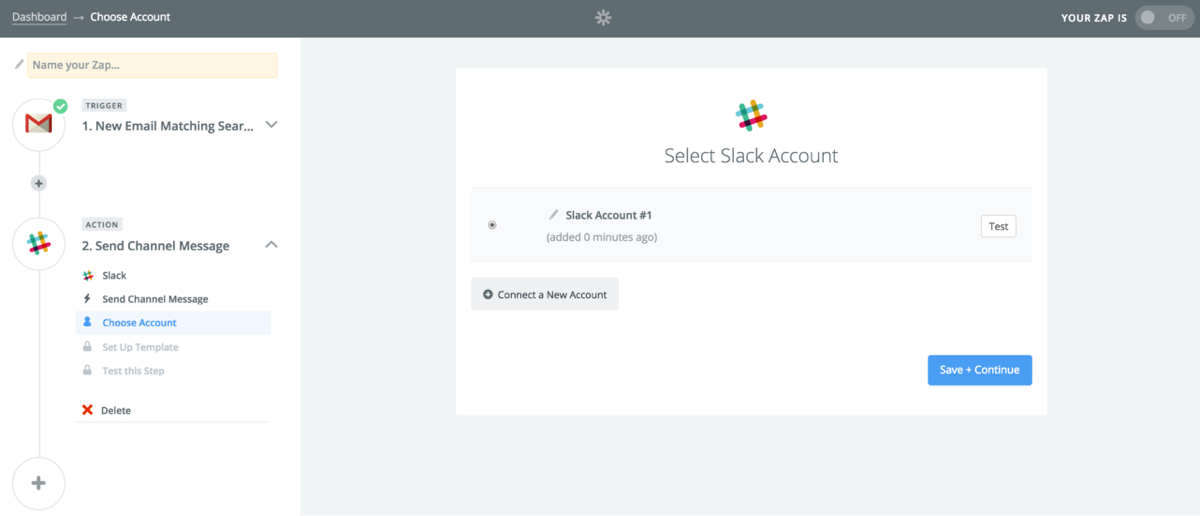
Just like with Gmail, we also need to select what Slack account this Zap is associated with.
Step 9
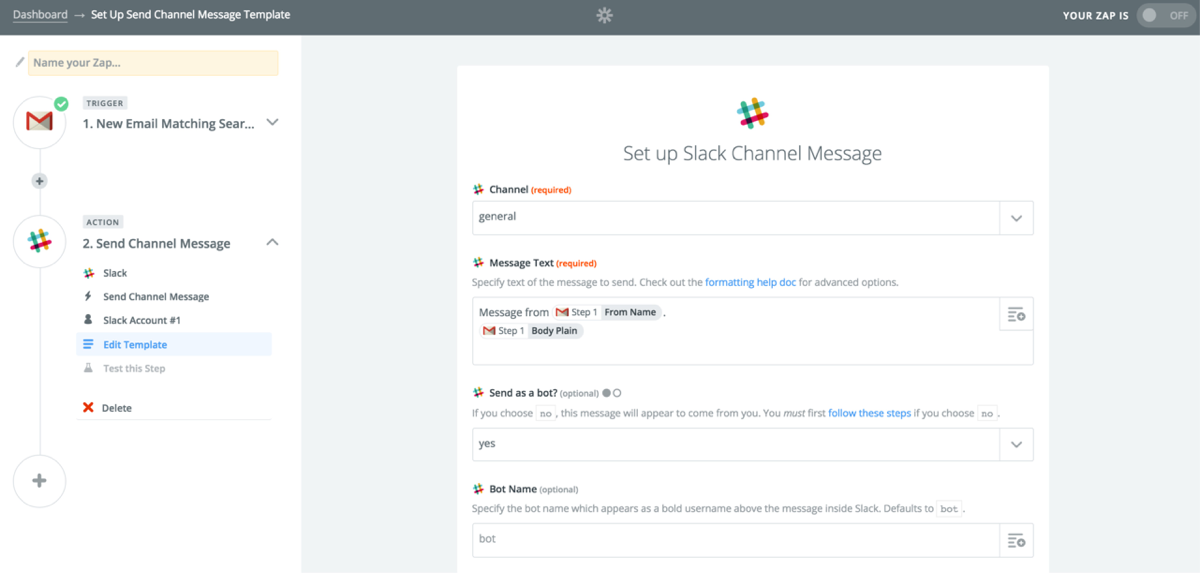
Now we need to set up the message that gets posted to Slack. Here we can select what channel we want our message to be posted in, as well as the content of the notification. By using the ‘insert field’ button, which is the symbol in the top right-hand corner of each text field, we can easily select fields to use in our Slack message from the email that has been received. We also have various other options, such as the ability to @ a certain Slack member, and attach an image by URL.
Step 10
[one-half-first] [/one-half-first]
[one-half]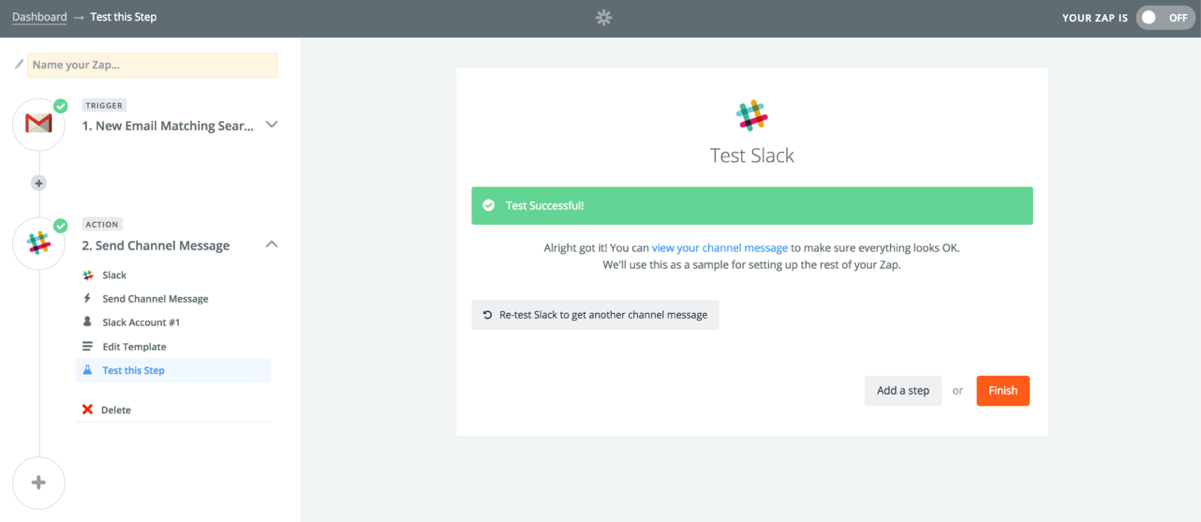 [/one-half]
[clearfix]
After we have set up both the trigger and action apps, Zapier will let us test that this Zap will work. Zapier does this by creating a dummy channel message. As we can see here, our Zap is working just fine.
Step 11
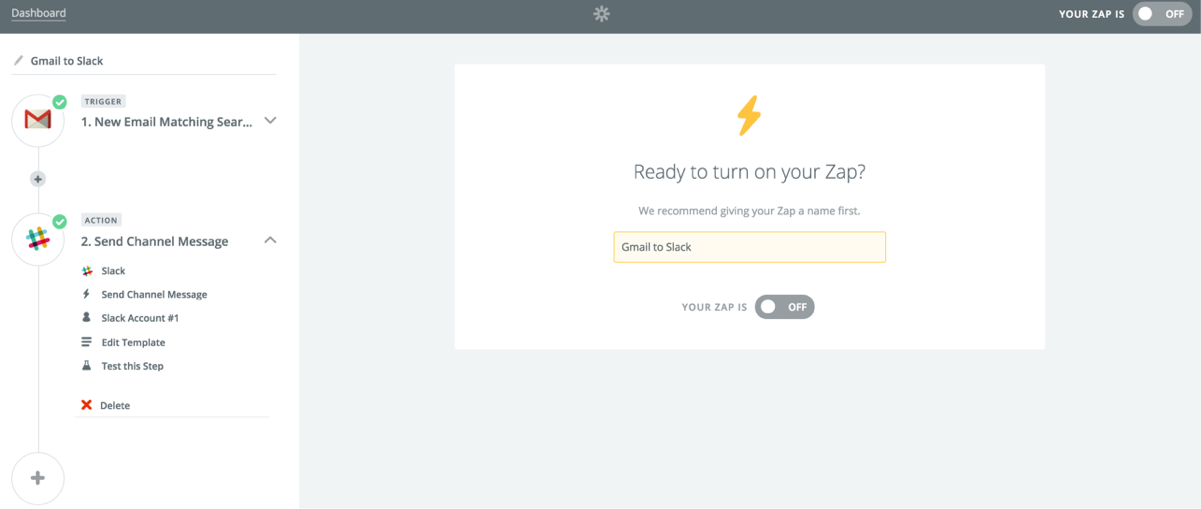
All that is left to do, now that we know our Zap is set up and working, is to switch Our Zap on.
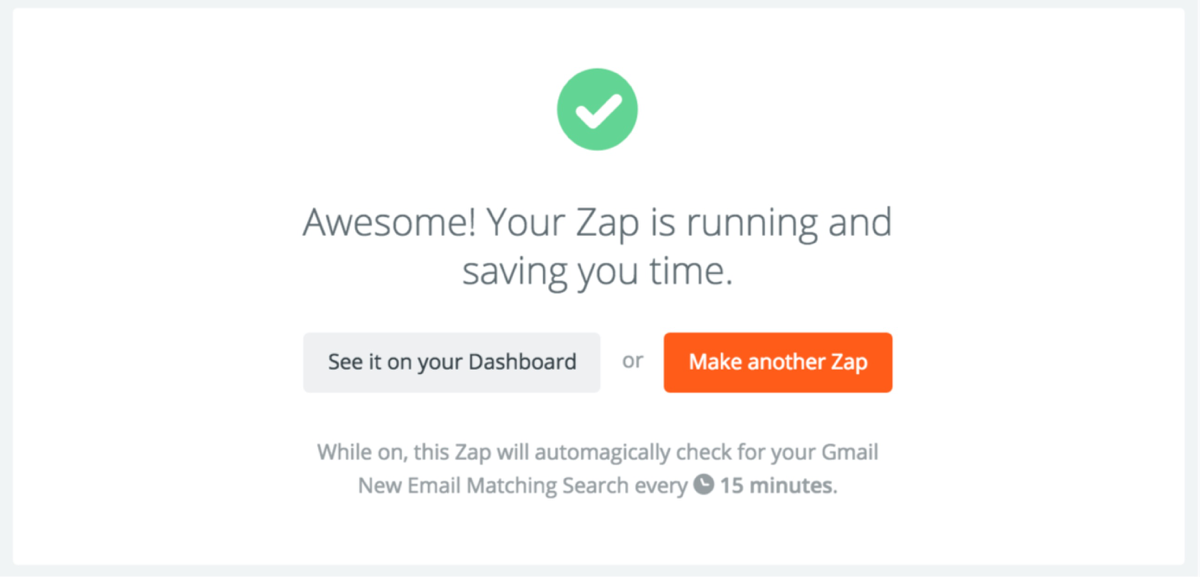
Now I can enjoy the benefits of business automation, in the knowledge that I will get notified in Slack whenever this specific Gmail user sends me an email.
Wrap Up
I hope you have found this tutorial helpful and interesting. Business automation certainly does save a lot of time, and when used correctly this can mean big financial savings. If you have any queries or questions, please let me know in the comments section below.
Leave a Reply